
Relocating Injection Molding Machines: Move & Restart
Ernest Parfentiev · Founder & Managing Director, NM SOLUTIONS
Injection molding machines (IMMs) are among the most demanding assets to relocate. They combine heavy, rigid steel frames with precision-machined tie bars, sensitive hydraulic or all-electric drives, tight platen parallelism tolerances, and process-critical temperature zones. Move one carelessly and you risk bent tie bars, oil contamination, misaligned platens, and weeks of scrap before the process stabilizes again. This guide walks through the full sequence — from pre-move survey to first good part — so a molding line comes back online predictably.
Start With a Machine-Specific Survey
Every IMM relocation begins with data, not lifting gear. Before touching anything, capture the details that will drive the whole plan.
- Machine specifics: clamp force (tonnage), overall weight, center of gravity, footprint, and shipping dimensions with and without the nozzle and hopper.
- Drive type: hydraulic, hybrid, or all-electric. Hydraulic machines carry large oil volumes and demand contamination control; electric machines are lighter but have exposed ballscrews and servo drives that need protection.
- Utility connections: power rating and phasing, cooling-water circuits, compressed air, and any central material-feed or drying lines.
- Auxiliaries: chillers, mold-temperature controllers (MTCs), dryers, granulators, robots, conveyors, and material loaders. Each is a mini-relocation of its own.
Photograph and label every connection. A 3D scan or at least a dimensioned layout of the destination bay prevents nasty surprises when the machine arrives.
Safe Shutdown and Energy Isolation
An IMM stores energy in several forms: hydraulic pressure, hot barrel zones, clamp mechanics, and electrical drives. Shut it down in the right order.
- Purge the barrel. Run the screw empty of resin to avoid degraded material solidifying inside. Purge compound helps clear color and residue.
- Cool controlled zones. Let barrel heaters, hot runners, and MTCs cool to a safe handling temperature before disconnecting anything.
- Apply lockout/tagout. Isolate electrical supply, relieve hydraulic pressure to zero, bleed accumulators, and lock the clamp in a safe position.
- Disconnect utilities. Cap cooling-water lines to prevent drips, blow down air lines, and drain condensate.
Never assume an accumulator is empty because the main power is off — verify pressure at the gauge and follow the manufacturer's bleed procedure.
Draining and Protecting Fluids
On hydraulic machines, the oil system is both heavy and vulnerable to contamination. Decide early whether to ship with oil in the tank or drain it.
- Drain when practical. Removing oil reduces weight and eliminates spillage during tilting or road transport. Store it in clean, sealed containers if you plan to reuse it, and filter it before refilling.
- Seal every port. Cap hydraulic lines, cooling connections, and the oil-fill opening. Even a small amount of dirt in a servo valve causes erratic motion later.
- Protect the reservoir breather. Tape or plug it so road dust and moisture stay out.
For mold-temperature controllers and chillers, drain water circuits fully to prevent freezing or corrosion in transit.
Dismantling Without Damaging Precision Surfaces
The tie bars, platens, and linear guides define the machine's molding accuracy. Treat them as reference surfaces, not structure.
- Protect the tie bars. They are ground and often chrome-plated. Wrap them, and never use them as lifting or lashing points. Any dent or nick can score the tie-bar nuts and bushings.
- Secure the moving platen. Clamp or block the platen so it cannot slide and hammer against the fixed platen during transport shocks.
- Remove overhanging items. Detach the hopper, nozzle assembly, guarding, and light curtains and pack them separately, clearly labeled to the parent machine.
- Support the injection unit. On larger machines the injection carriage may need its own restraint so it does not shift on the linear rails.
Document every bolt torque and cable route you disturb. Re-torque values on tie-bar nuts and platen fixings are not guesswork — they come from the manufacturer's specification.
Rigging, Lifting and Transport
An IMM is compact but very dense, with a center of gravity that is rarely central. Use a proper lift plan.
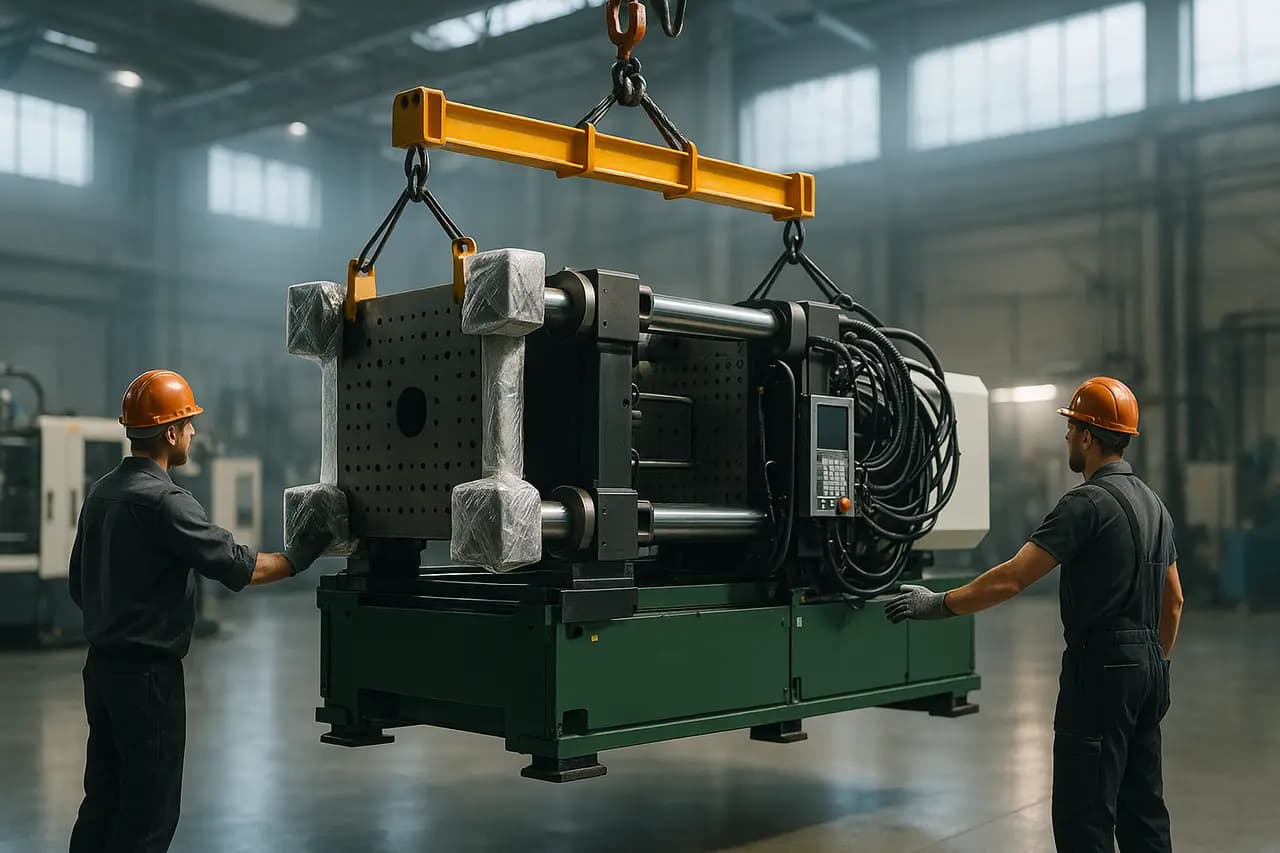
- Use designated lifting points or a certified spreader beam. Avoid slinging under the barrel or tie bars.
- Balance for the offset CoG. The clamp end is usually heavier than the injection end; verify the balance point during the first careful lift.
- Choose the right access method. Machinery skates, air casters, or hydraulic gantries move the machine within a low-clearance hall; a crane handles the truck load.
- Restrain for the road. Lash to the trailer bed against the CoG, protect edges, and monitor with shock and tilt indicators for high-value machines.
All-electric machines need extra care around the servo-driven injection unit and ballscrews, which do not tolerate impact loads well.
Site Readiness at the Destination
The machine should arrive to a bay that is ready to receive it.
- Foundation and floor: verify slab thickness and load-bearing capacity for the machine's static and dynamic loads. Larger tonnage machines may need a reinforced pad or isolation to control vibration.
- Utilities pre-run: power at the correct rating and phase rotation, cooling water with adequate flow, dry compressed air, and material-feed piping terminated where the machine will stand.
- Clearances: allow space for mold changes, robot reach, barrel removal, and maintenance access — not just the footprint.
Leveling, Alignment and Utility Reconnection
Setting the machine is where precision returns.
- Level the base using the machine feet and a precision level to the tolerance in the manual. An out-of-level frame distorts platen parallelism.
- Check platen parallelism. After leveling, verify parallelism between fixed and moving platens; a molding machine that is twisted will flash molds and wear tie bars unevenly.
- Reconnect utilities and confirm phase rotation before energizing — a reversed pump motor can be damaged immediately.
- Refill and prime hydraulics. Fill with clean, filtered oil, bleed air from the system, and check for leaks under low pressure first.
Commissioning: From Power-On to First Good Part
Restart methodically rather than jumping to production speed.
- Power up and self-check. Confirm safety gates, light curtains, and emergency stops function before any motion.
- Dry-cycle without material. Verify clamp movement, ejector strokes, and injection carriage motion at reduced speed.
- Bring zones to temperature. Heat the barrel and hot runners, then purge before the first shot.
- Requalify the process. Reload the machine and mold parameters, then run a short qualification: dimensional checks, short-shot and pressure studies, and a scrap review until parts are stable.
- Reintegrate auxiliaries. Recommission the robot, conveyor, chiller, and MTC as a system, confirming signal handshakes.
Keep the original process sheets and mold data. A move rarely reproduces identical results on the first cycle, but well-documented settings turn days of tuning into hours.
Plan for Minimal Downtime
The biggest cost of an IMM move is lost production, not the crane. Sequence machines so critical molds restart first, stage spare seals and filters in advance, and schedule utilities and calibration crews to arrive with the machine. With disciplined dismantling, contamination control, and structured commissioning, an injection molding line can be relocated and back to validated parts with confidence.
Related
Ernest Parfentiev
Founder & Managing Director, NM SOLUTIONS
NM Solutions specializes in the dismantling, relocation, installation and commissioning of industrial equipment and production lines across Europe — with hands-on project experience in metallurgy, food, packaging and building-materials plants.